
A Step-by-Step Guide on Bathroom Renovations: How to Remodel a Bathroom

So we are looking into remodeling a bathroom, what does that look like? Whether we're looking to create an oasis to escape in or simply update outdated fixtures, embarking on a bathroom renovation can be an exciting yet daunting task. Well, with any renovation in general, there should be a step-by-step plan in place before the process can begin. Without a clear roadmap, what starts as a simple upgrade can quickly turn into an overwhelming and costly endeavor. Today, we will discuss that plan, & the steps that should be taken to complete any bathroom renovation, but more importantly, where we are involved. From initial planning to the final touches, these steps have proven to work the best for us in creating beautiful bathrooms that stand the test of time. After nearly 5 years in the industry, we have found the following guide to be the most effective.

Step 1:
Vision, Plan and Budget
Alright, so the first thing we need to do, when we’re thinking about remodeling a client’s bathroom, is to get their vision clear. We think about what they want their new bathroom to look like. Are they dreaming of a sleek, modern space with clean lines and minimalist fixtures? Or maybe they’re more into a cozy, rustic vibe with lots of natural materials? Whatever it is, we take some time to really picture it in everyone’s mind.
Once we’ve got that vision, it's time to start planning. This is where we start figuring out the details, like what materials we'll need, what kind of layout will work best, and how long the whole project might take. It doesn't have to be super detailed at this stage, but having a general idea will make the rest of the process a lot smoother. It also can be helpful to have our client gather some inspirations to refer to. This could be a friend or family member’s bathroom, or a bathroom that they saw online- whatever it might be, it helps to have that ‘in their back pocket’ to conjure some cool ideas.
And we can't forget about the budget. Our clients all have dreams, but it's important to be realistic about what they can afford. Allow them to take a look at their finances and set a budget that works for them. The bathroom packages we offer under services can help give our clients an idea of what this looks like. Keep in mind, though, that renovations often come with unexpected costs, so it's a good idea to leave a little wiggle room in their budget for those surprises. Having a clear vision, a solid plan, and a realistic budget will set our clients up for success as we move forward with their bathroom renovation.

Step 2:
Choosing the Right Materials
Now that we’ve got a vision, plan, and budget sorted, it’s time to dive into picking out and ordering the correct materials. This is where our clients’ dream bathroom starts to take shape. But before we get too carried away, it’s important to make sure we’re choosing the right materials for the job.
First off, think about the essentials like tiles, fixtures, and cabinetry. We want to choose materials that not only look great but are also durable and suited for a bathroom environment. We help out as much as we can with this process, providing our experience to help in the decision-making process. For example, if we’re thinking about flooring, something like porcelain tile is a solid choice because it’s water-resistant and easy to maintain. On the other hand, natural stone, or something similar, might look amazing but could require more upkeep. Regardless of the choice, it is vital to think about the longevity & practicality of any materials we choose.
Next, consider the timeline. Some materials, especially custom or high-end ones, might take a while to arrive. We don’t want to be stuck waiting around for a special order when we’re ready to start installing. So, we make sure to check the availability and delivery times before we place any orders for our clients. If our clients don’t mind waiting, we certainly want to get ahead of it, and think about that timeline as well.
Finally, and most importantly, stick to the clients’ budget. It’s easy to get tempted by those fancy fixtures or high-end finishes, but remember the budget everyone involved set earlier. Try to find a balance between quality and cost. If we’ve done our homework and order the right materials, like we always make sure to do, we’ll be in good shape to move on to the next step of our clients’ renovation journey.
Our Suggestion:
We suggest GREENGUARD by UL when it comes to choosing our building materials. With choosing paints, finishes, or even flooring, look for products that are GREENGUARD-certified. These products have been tested for low chemical emissions, meaning they contribute to better indoor air quality. It’s a great way to ensure our new bathroom is not only visually-pleasing but also healthier for our clients and their family. When anyone chooses Urban Miracle Renovations to do their remodeling job, we can guarantee them that GREENGUARD products are the only materials being used.

Step 3:
Demolition
Ah, the demolition stage. When it comes to bathroom demolition, we know it’s not exactly everyone’s idea of a good time. The thought of tearing through tiles, ripping out fixtures, and dealing with the mess might seem overwhelming, but that’s where we come in to make it easy.
First things first, we take safety seriously. Before any work begins, we make sure the space is prepped with all the necessary safety measures. We’ll handle everything from turning off the water supply to ensuring electrical safety. No need to worry about unexpected leaks or shocks- our team is trained to manage all these details so our clients don’t have to. Trust us, a little prep work goes a long way in avoiding accidents.
Once everything is secure, we get down to the actual demolition. Whether it’s pulling out old fixtures, removing outdated tiles, or even taking down walls for a bigger remodel, we’ve got it covered. But we don’t just go in with brute force- we work smart. Our team carefully dismantles the bathroom, paying close attention to plumbing and electrical elements to avoid any unnecessary damage. This way, there won’t have any surprise repair costs down the line.
Finally, we do not forget to properly dispose of the debris. After the demo is done, we will not leave our clients with a mess. Cleanup is a big part of what we do. We’ll haul away all the debris, whether it’s a small pile of tiles or an entire dumpster’s worth of material. By the time we’re finished, the space will be cleared out and ready for the next exciting phase of the renovation.
With us handling the demolition, our clients can relax knowing this crucial step is in expert hands. We take the stress out of the process, letting them focus on the fun part, designing and building their dream bathroom.
Step 4:
Electrical and Plumbing
With demolition out of the way and the materials on hand, it's time to focus on the behind-the-scenes work, electrical and plumbing. This step might not be as glamorous as picking out tiles or fixtures, but it is, in our opinion, the most crucial to getting our clients’ bathroom functioning the way it is supposed to.
If our client is planning to relocate their shower, sink, or toilet, this is the time to get it done. If anyone work with us, our team works with skilled plumbers who ensure that everything is installed correctly, from the pipes behind the walls to the fixtures we see every day. Whether we’re upgrading to a rain shower or adding a double vanity, we make sure our client’s plumbing is set up to handle it all without any hassle.
Next up is the electrical work. This is our chance to, again, rethink where we want things, such as the bathroom lighting and outlets. Want to add recessed lights, a stylish vanity fixture, or even heated flooring? Now’s the time to wire it all up. Our experienced electricians handle everything from installing new circuits to making sure all the outlets are safely grounded. Plus, we can help plan for energy-efficient lighting solutions, like LED fixtures, that can save our clients money in the long run.
We coordinate all of this behind the scenes so our clients don’t have to worry about a thing. Once the plumbing and electrical work is done, we’ll have a solid foundation for all the exciting finishes that come next. And when everything’s in place, we’ll know that our new bathroom isn’t just a stunning masterpiece, but also something built to last.

Step: 5
Drywall and Paint
It’s time to start making the bathroom look like, well, a bathroom again! We do our best to make sure that process is seamless as well. Getting those walls back up with drywall and giving them a fresh coat of paint is no small task, but with us handling it, our clients can expect flawless results.
First up, drywall. This a job that requires precision and patience. Our team takes care of everything- from carefully measuring and cutting the drywall to fit perfectly, to securing it in place with precision. We don’t just hang drywall; we make sure every seam is flawlessly taped and mudded, leaving our clients with a smooth, clean surface that’s ready for the next step. It might take a few coats, and a bit of sanding, but once we’ve got it down, we’ll have a clean, flat surface ready for painting. It is very crucial to be sure all these steps are tackled before we begin painting.
But we don’t stop there. Once the drywall is up and perfectly prepped, we move on to painting. Choosing the right paint is vital, especially in a bathroom where moisture resistance is key. We’ll help our clients select the best paint for the job, ensuring it not only looks great but also stands up to the unique challenges of a bathroom environment. And when it comes to the actual painting, our professionals handle it all, delivering a smooth, even finish that transforms the space.
We also understand that choosing the right color can make or break the overall feel of the bathroom. That’s why we’re here to guide our clients through the process, offering expert advice on color selection to ensure their vision comes to life. With us on the job, they won’t have to worry about a thing. We take care of every detail, from drywall installation to the final brushstroke, so our clients can sit back and watch their bathroom transform into a aesthetic, finished space. And when we’re done, they’ll be ready to move on to the next exciting phase: Cabinetry and Tile Work.

Step: 6
Cabinetry & Flooring
Now that the walls are looking fresh, it’s time to focus on two key elements that can be roped in together and really complete the bathroom: Cabinetry and Flooring
Let’s dive into cabinetry, one of the key elements that bring both functionality and style to the bathroom. Whether we’re opting for a clean, modern vanity or something with a more traditional vibe, installing cabinetry is where the bathroom really starts to take shape. If we’re working with pre-assembled cabinets, the installation process is usually pretty straightforward. It’s all about making sure everything is perfectly level and securely anchored to the wall. We’ll take care of the precise measurements and adjustments needed to ensure our clients’ cabinets are not only functional but also look flawless. This might seem like a simple task, but getting that level of precision is important- nobody wants a crooked vanity!
Now, if we’re going with custom cabinets, that’s where things can get a bit more complex, and that’s where our expertise really shines. Custom cabinetry offers a lot of flexibility, especially if we’re working with an unconventional space or need the cabinets to fit around plumbing fixtures. We’ll meticulously measure and design the cabinetry to fit perfectly, taking into account every angle and obstacle. Whether it’s a tight corner, an awkward layout, or existing fixtures, we’ll make sure the custom pieces are crafted and installed to maximize both space and style.
And it’s not just about fitting the cabinets into the space; it’s about anchoring them securely and ensuring they will last for a very long time. Our team knows exactly how to handle the intricacies of custom installations, so our clients can rest easy knowing that the cabinets will be sturdy, well-fitted, and beautiful.
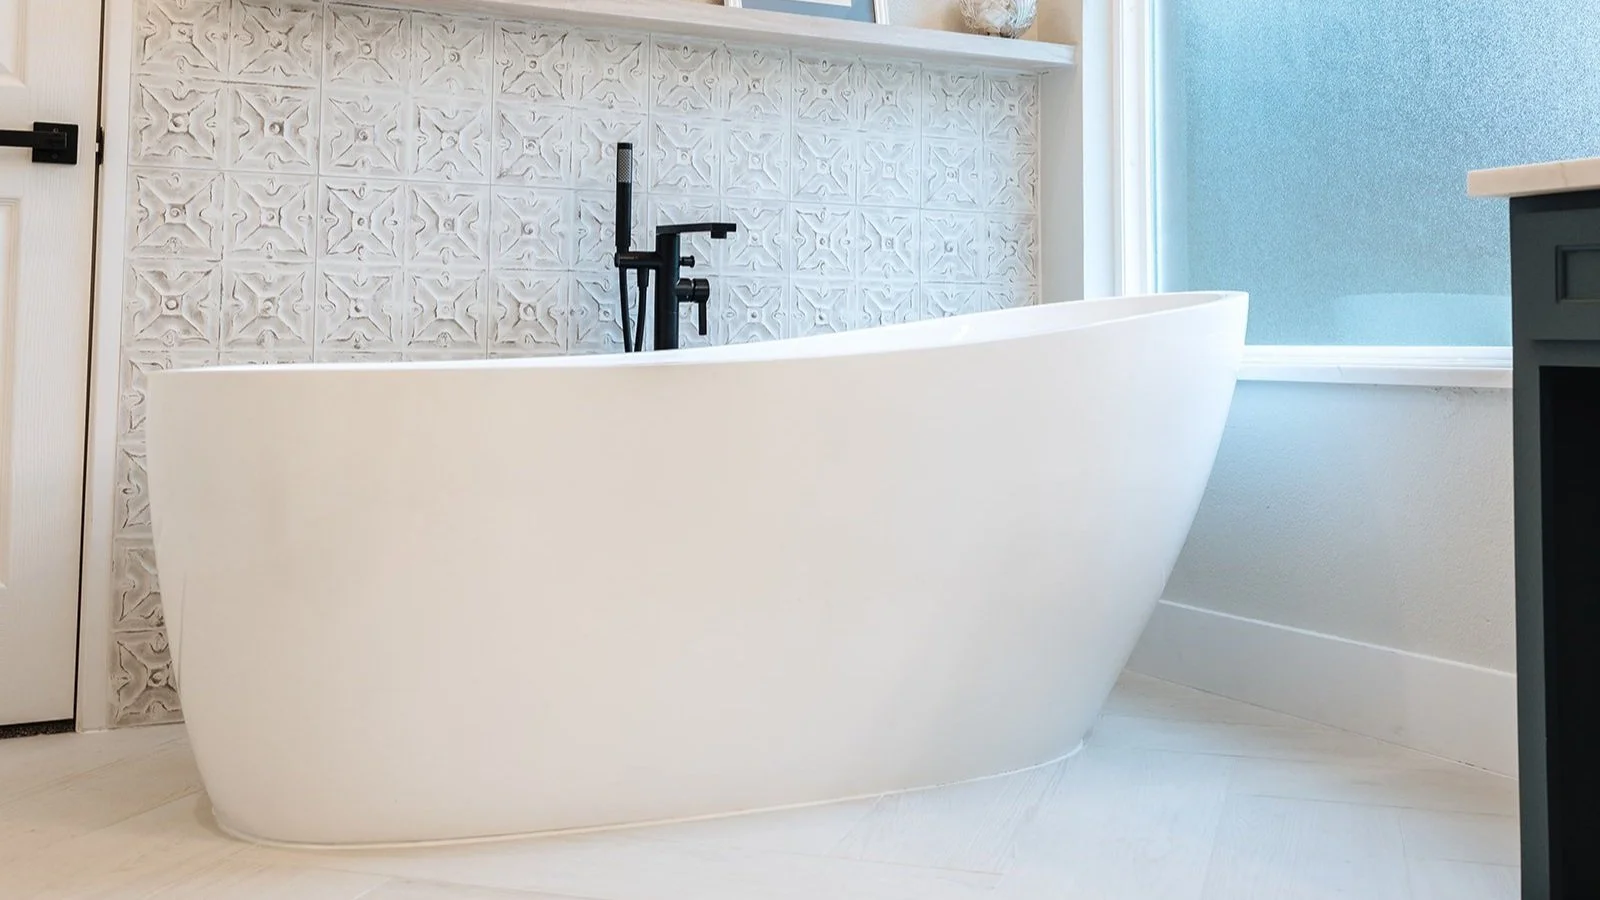
Next up is the flooring: The choice of flooring can really set the tone for the entire room, whether we’re going for the timeless look of ceramic tile, the warmth of luxury vinyl, or the durability of natural stone. Laying down tile or vinyl planks can be satisfying, but, just like everything else, it does require careful planning. We’ll need to start with a smooth, clean surface, and take our time to make sure everything lines up perfectly. And of course, we won’t overlook the details, like selecting a grout that not only complements the tile but is also moisture-resistant, ensuring the floor looks great and holds up over time. By the time we’re done, the new bathroom floor will be just that: a brand new bathroom floor.

Step 6:
Finishing Touches
And FINALLY! We’re almost there! With the major elements of the bathroom renovation complete, it’s time to focus on the finishing touches that bring everything together.
This stage is all about the details. Think of it as the icing on the cake that makes our bathroom look polished and complete- the cake can be properly made and taste good, but we want it to also be a pretty cake, same goes for our clients’ bathroom. We will start by installing the trim around the room and touching up the paint, if necessary. These final details give our bathroom that polished, complete look. Next, personalize the space with window treatments, decorative storage options, and artwork to reflect the clients’ style, adding items like towel racks, mirrors, and lighting fixtures. These elements not only enhance the space but also add a touch of style and personality. Also, we want to consider the final accessories- things like stylish soap dispensers and chic bath mats. These small additions can tie in the whole room and make it feel cohesive. Don’t forget to think about practical features too, such as ample lighting for tasks like shaving or applying makeup.
The finishing touches are where our clients’ personal style really shines through. Whatever the style is that we are going for, the right details can make a huge difference. This is also the stage where we can add any special features or upgrades that our clients have been dreaming of, like a new showerhead or a custom glass shower door.
Once these final elements are in place, their bathroom will be fully transformed, ready for them to enjoy. It’s the culmination of all our hard work and planning, and it’s the moment when our clients’ vision becomes a beautifully functional reality.
How To Remodel a Bathroom: An Overview
And there we have it! A comprehensive guide to tackling a bathroom renovation from start to finish. By following these steps- beginning with thoughtful planning, choosing the right materials, and executing each phase with precision- we’re on the right path to transforming any bathroom into a space we, and our clients, will truly love. This guide is designed to help us navigate the renovation process with confidence and clarity.
While taking on some tasks ourselves can be fulfilling, there are times when expert help is invaluable. That’s where we, Urban Miracle Renovations, comes in. With nearly five years of experience, we’ve honed these steps to ensure a smooth, stress-free, and successful renovation. We’re here to handle the complexities, ensure every detail is perfectly executed, and support each other through every stage of the process.
So, don’t bother rolling up your own sleeves, bring in the experts! Let us get started on creating the bathroom of our, many different, clients’ dreams. With careful planning and the right expertise, any bathroom renovation will not only be enjoyable but also incredibly rewarding. Here’s to creating stunning new bathrooms that stand the test of time and exceed all expectations!