
A Step-by-Step Guide on Kitchen Renovations: How to Remodel a Kitchen

A lot of people have been there- considering a kitchen remodel- well what does that entail? Whether the goal is to transform it into a chef-like dream space or to modernize outdated elements or to change the kitchen’s layout entirely, kitchen renovations can be both rewarding and complex. To keep things on track, it's crucial to have a well-thought-out plan before getting started. Without a clear direction, even a minor refresh can quickly escalate in cost and complexity. In this discussion, we’ll outline the essential stages of a successful kitchen remodel and highlight where we fit into the process. Drawing from nearly 5 years of experience, & from a similar blog from last week (A Step-by-Step Guide on Bathroom Renovations: How to Remodel a Bathroom) we've developed an effective method for crafting kitchens that not only meet our clients' needs but also maintain their beauty and usability for years to come. Join the journey on how to remodel a kitchen, with Urban Miracle Renovations!
Vision, Plan, and Budget to an Estimate
Choosing the Right Materials
Cabinetry Work
Demolition
Electrical and Plumbing
Drywall and Paint
Installing Countertops and Backsplash
Installing Fixtures, Lights and Cabinet Hardware
Finishing Touches

Step 1:
Vision, Plan, and Budget to An Estimate
The first step in any kitchen renovation is to clearly define the client’s vision. We take the time to understand what they want their new kitchen to embody. Are they envisioning a fresh, contemporary space with streamlined cabinetry and modern finishes? Or perhaps they lean more towards a warm, traditional vibe with plenty of natural textures? In whatever the client decides, it is important that everyone is on the same page before the further steps of the project can begin. We want to make sure there is no confusion between us and our client to avoid any unnecessary headaches in the future.
With that vision in place, we move into the planning phase. Here, we start mapping out essential elements like material choices, the optimal layout, and a rough project timeline. While we don’t need to get into the nitty-gritty details just yet, having a general outline makes everything much easier down the road. Encouraging our clients to gather inspiration- whether from a friend’s kitchen, online ideas, or design magazines- can be really helpful at this stage.
Budgeting is another key aspect we can’t overlook. While everyone has big dreams for their kitchen, it’s important to balance those ambitions with what’s financially feasible. We guide our clients in assessing their budget and provide insights based on the kitchen packages we offer. Of course, renovations often come with unexpected expenses, so we recommend building some flexibility into the budget to account for surprises. By establishing a clear vision, a thoughtful plan, and a realistic budget, our clients are well-positioned for a successful kitchen renovation.
Once we have a solid understanding of the client’s vision, preferences, and budget, we move forward with preparing an estimate. This involves breaking down the costs associated with materials, labor, and any additional services that might be required. We consider every detail, from cabinetry and countertops to fixtures and appliances, ensuring nothing is overlooked. Our estimates are designed to be transparent and comprehensive, giving clients a clear picture of what to expect. We also discuss potential variables, like changes in material prices or unexpected structural needs, so there are no surprises later on. With a detailed estimate in hand, our clients can move forward confidently, knowing exactly where their investment is going.

Step 2:
Choosing the Right Materials
The next step is selecting and ordering the right materials that will bring the vision & design to life. This is where the dream kitchen starts taking shape, but it’s essential to choose materials that are both stylish and practical.
Durability and functionality are key- especially in high-use areas like kitchens. We focus first on core elements like tiles, fixtures, and cabinetry. We guide our clients through this process, drawing from our experience to recommend options that strike the right balance. Example: While porcelain tile is a reliable, low-maintenance choice for flooring, it also might not be the most luxurious or stylish. Conversely, a natural stone might require more upkeep but could give off more of an aesthetic appeal. Regardless, and as it always should be, longevity and accessibility are always top of mind when making these decisions.
Timing is another crucial factor. Some materials, particularly custom or premium selections, can have extended lead times. To avoid delays, we carefully check availability and estimated delivery dates before placing orders. If a client is willing to wait for something special, we account for that in our timeline, ensuring everything is aligned.
Most importantly, we remain mindful of the budget. It’s easy to get drawn to high-end finishes, but sticking to the financial plan ensures the project stays on track. By selecting the right materials within the set budget and timeframe, we are well-prepared to move forward properly with the renovation.
Our Suggestion:
We suggest GREENGUARD by UL when it comes to choosing our building materials. With choosing paints, finishes, or even flooring, look for products that are GREENGUARD-certified. These products have been tested for low chemical emissions, meaning they contribute to better indoor air quality. It’s a great way to ensure our new bathroom is not only visually-pleasing but also healthier for our clients and their family. When anyone chooses Urban Miracle Renovations to do their remodeling job, we can guarantee them that GREENGUARD products are the only materials being used.

Step 3:
Cabinetry Work
With materials ordered, the next stage centers around cabinetry, a key element in any kitchen renovation. Whether we’re designing custom cabinets or upgrading existing ones, this step plays a significant role in the style of the kitchen.
For custom cabinetry, all of our custom cabinetry is full custom to each kitchen we do. we work closely with clients to design pieces tailored to their needs and what they prefer, ensuring the layout maximizes storage while complementing the overall design. This is where the kitchen’s character really starts to shine. We focus on details like finish, hardware, and configuration, making sure every aspect aligns with our clients’ vision.
With the clientele that we work with, it is rare that we keep the existing cabinetry, but there are some cases. If we’re working with existing cabinets, we explore options like refinishing, repainting, or converting them to achieve a fresh, updated look without the cost of full replacement. Modifications like adding new doors and drawers or even adjusting the cabinet height can breathe new life into older units if they choose to stay with their original cabinetry.
(If it is the case of working with the existing cabinetry, we will typically perform demolition before this step)
Throughout this process, it’s crucial to ensure precise measurements and planning, as cabinetry sets the foundation for the rest of the kitchen’s layout. With these details sorted, the kitchen’s framework is solid and ready for the next step: demolition.

Step 4:
Demolition
Kitchen demolition can feel overwhelming, but it’s an essential starting point for any renovation. While tearing out cabinets, removing countertops, and dealing with the resulting debris might seem intimidating, we ensure the process goes as smoothly as possible.
Safety comes first. Before we touch anything, we make sure everything is secure- shutting off the water, double-checking electrical systems, and prepping the site. This way, there’s no risk of leaks or electrical issues. Our team, of course, handles these steps so our clients don’t have to worry.
When it’s time to demo, we carefully remove existing elements- whether that means tearing out old cabinetry, pulling up floors, or even knocking down walls for a more open layout. We focus being extremely careful to avoid damaging key systems like plumbing and wiring.
Once the demo is done, we don’t leave a mess behind. Proper cleanup and debris removal are part of our process, from hauling out old countertops to disposing of cabinets. By the time we’re finished, the space is clean and ready for the next phase of the renovation.
With us managing the demolition, our clients can stay focused on designing their dream kitchen while we handle the tough part with care and expertise.

Step 5:
Electrical and Plumbing
It’s time to turn our attention to the critical: electrical and plumbing work. While this phase might not have the visual appeal of selecting countertops or cabinetry, it’s essential for ensuring the kitchen functions flawlessly.
If any major changes are planned- like moving the sink, stove, or dishwasher- this is the phase where it all happens. Our team collaborates with expert plumbers to make sure all installations are precise, from the hidden pipes to the visible fixtures. Whether adding a new prep sink or relocating major appliances, we ensure the plumbing is up to the task.
Next, we move on to the electrical work. Now’s the time to wire everything properly- maybe our client is considering under lighting for the cabinets, or pendant fixtures or outlets for additional appliances. Our skilled electricians handle everything from setting up new circuits to ensuring all connections are safe and compliant with codes. We also assist in choosing energy-efficient options like LED lighting, which can help reduce utility bills over time.
We manage all these technical details so our clients can focus on the exciting aspects of their kitchen renovation. With everything properly installed, our clients’ new kitchen will not only look fantastic but also function seamlessly for years to come.

Step: 6
Drywall & Paint
Now it’s time to transform the kitchen from a construction zone into a functional space once more. We make sure this stage is handled with precise care, so the results are nothing short of excellent.
We begin with the drywall installation. This step demands meticulous attention to detail. Our team expertly measures, cuts, and installs the drywall to fit seamlessly, ensuring every piece is aligned perfectly. We don’t just hang drywall; we meticulously tape and mud every seam, creating a flawless, smooth surface ready for finishing. This process might involve multiple coats and some sanding, but that is what it takes to ensure that the surface is perfectly prepared before moving on.
Next, we tackle the painting. In a kitchen, choosing the right paint is crucial, especially for durability and easy maintenance. We assist clients in selecting a paint that not only enhances the kitchen’s aesthetic but can withstand the kitchen’s demanding environment- and one that is of course eco-friendly and healthy. Our professional painters apply the paint with skill, providing a uniform, high-quality finish that brings the kitchen to life.
But we don’t stop at walls. Painting the cabinetry is another key aspect of this transformation. Our team carefully preps and primes the cabinets, followed by applying high-quality paint to achieve a smooth, durable coat. This process not only enhances the cabinetry’s appearance but also ensures it’s resilient against daily wear and tear.
Color choice can significantly impact the kitchen’s ambiance, so we offer expert guidance to help our clients select hues that align with their vision and the rest of their home. With our team managing everything from drywall installation to the final coat of paint, clients can relax and watch their kitchen evolve into a beautiful, polished space. By the end of this phase, the kitchen is almost completed!
Step: 7
Installing Countertops and Backsplash
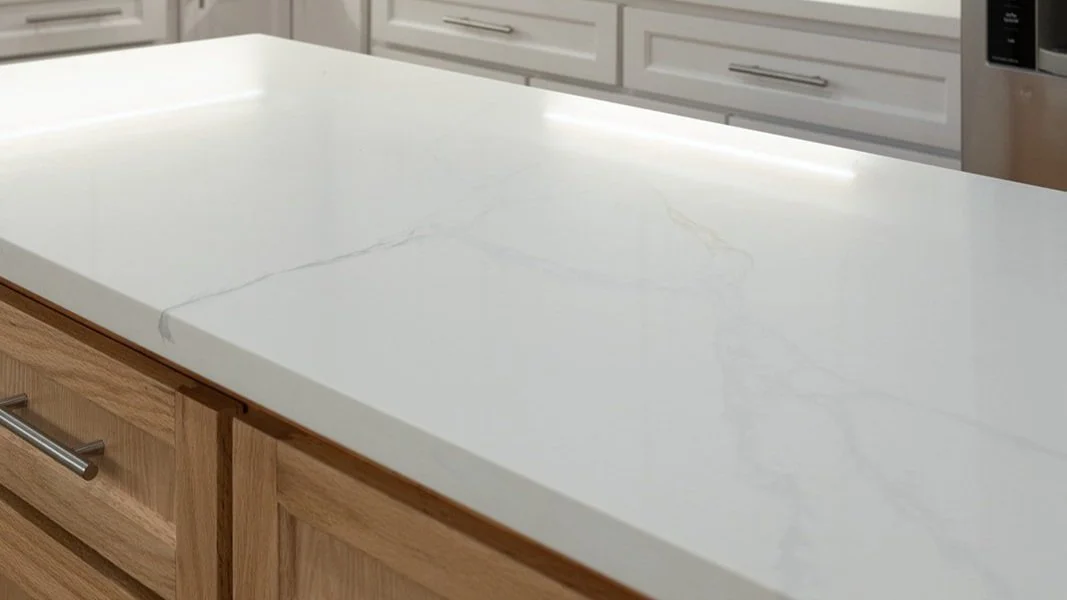
With the walls and cabinetry beautifully painted, it’s time to elevate the kitchen with the installation of countertops and backsplash. This is where the space starts to take on its final character and become a kitchen again.
First, we tackle the countertops. Whether clients choose granite, quartz, marble, or another material, precise installation is crucial. Our team carefully measures and cuts the countertops to fit seamlessly into the kitchen’s layout. We handle the installation, ensuring that every piece is fits as it should. Our goal is to create a surface that not only looks stunning but stands up to day-to-day use. We also make sure to address any rough seams or edges before moving on to the backsplash.
Next, we move on to the backsplash. The backsplash is both a functional and decorative element, protecting the walls from cooking or cleaning residue while adding a stylish touch. We help clients choose from a variety of materials- such as subway tiles, mosaic patterns, or glass panels- that complement their kitchen design. Our installation process involves careful placement and grouting to ensure that each tile is evenly spaced and securely fixed. We take the time to clean up any excess grout and polish the tiles, leaving a pristine, high-impact feature that ties the kitchen together.
Throughout both installations, we prioritize attention-to-detail and craftsmanship. By paying close attention to every detail, we ensure that the countertops and backsplash not only enhance the kitchen’s beauty but also contribute to its daily life. With these elements in place, the kitchen is now ready to showcase its new, cohesive look and feel.

Step 8:
Installing Fixtures, Lights and Cabinet Hardware
Now that the countertops and backsplash installed, we’re ready to tie in the kitchen’s whole vibe with fixtures, lighting, and cabinet hardware.
We start by installing the fixtures. Whether it’s a sleek faucet, a modern sink, or cutting-edge appliances, we handle each component. Our team ensures all connections are secure and that every fixture integrates perfectly with the existing setup, making sure everything functions properly.
Next, we focus on lighting. Effective lighting enhances both the style and practical use of the kitchen. We help clients select and position various lighting options- from under-cabinet lights that brighten work areas to statement pendants that set the room’s mood. Our installation process makes sure that all fixtures are properly wired and installed to provide optimal light and enhance the kitchen’s atmosphere.
Finally, we turn our attention to cabinet hardware. The right handles and knobs can significantly impact the kitchen’s appearance. We assist in choosing hardware that complements the cabinetry and design theme. Our team attaches each piece, ensuring a perfect fit and alignment, adding both visual appeal and ease of use.
In this stage, we pay meticulous attention to everything we install, making sure that fixtures, lighting, and hardware are installed flawlessly. With these elements in place, it’s on to the final step: The Finishing Touches.

Step: 9
Finishing Touches
Now that the major components of the kitchen in place, it’s time to focus on the finishing touches. This final phase adds the details that elevate the kitchen from complete to truly exceptional.
We start by adding decorative elements and accessories. This might include installing stylish drawer liners or window treatments, etc.. These small additions enhance the kitchen’s charm and personal flair, giving it a warm, welcoming feel.
Next, we address any final adjustments. This includes fine-tuning cabinet doors for perfect alignment, making sure all fixtures are securely fastened, and checking that all appliances are properly calibrated. We also handle any minor touch-ups needed on walls or surfaces to ensure every detail looks polished.
Finally, we conduct a thorough review to ensure everything meets our high standards. This involves a careful walkthrough to confirm that all elements are working as intended and that the kitchen is fully functional and visually cohesive. We take the time to make any last-minute tweaks and ensure that the space is spotless and ready for use.
How to Remodel a Kitchen: An Overview
With nearly five years of experience, we have refined a process that has never failed us and has given us a useful guide to follow. Our proven approach begins with a clear vision, detailed planning, and a well-defined budget. We then provide a comprehensive estimate, setting the stage for a successful project.
Choosing the right materials is crucial, and we guide our clients through selecting options that combine beauty with durability. Next, we focus on cabinetry work, whether it involves custom designs or updating existing pieces, to ensure a perfect fit for the new layout. Demolition follows, where we carefully remove old elements while preparing the space for the next stages. This is followed by essential updates to electrical and plumbing systems, laying the groundwork for a fully functional kitchen. With the everything in place, we install drywall and paint, creating a smooth, fresh canvas. The installation of countertops and backsplash adds so much character, setting the tone for the kitchen’s look. We then move on to installing fixtures, lighting, and cabinet hardware, each chosen and positioned with care. Finally, we apply the finishing touches, from decorative accents to final adjustments, ensuring every detail contributes to the entire kitchen overall.
In the end, we make sure that every detail contributes to the kitchen’s appeal and longevity. The result is a kitchen that not only looks stunning but also offers a perfect blend of style and practicality.